Showing posts with label Snack. Show all posts

Wednesday, March 6, 2013

Candied Sweet Potato Fries

     A few weeks ago, while searching for a quick yoga workout on Yogi Tara Stiles' YouTube channel, I came across a video (see below) of Tara sharing her recipe for Candied Sweet Potato Fries. All I can say is YUM-O! I found these to be a delicious between-meal snack that were plenty filling, the next time I made them I used them as a side to compliment my quinoa, kale, and tofu stir-fry. Give 'em a try, they are delish! As a side note, feel free to play around with the recipe and don't stress if the exact ingredients aren't in your cupboard. I had agave syrup and olive oil on hand, so I swapped them out for the maple syrup and coconut oil. Also check Tara's yoga videos, they are a great way to sneak 10 minutes of mat time into your day.

Namaste, 
Tamar


Monday, September 17, 2012

Review: Uber by Larabar

                                                                                               Source: larabar.com via Ladies on Pinterest

    
     If you've been following us for awhile, either here or over on Ladies Holiday, then you know how much Deirdre and I appreciate a good snack bar (which you can read about here and here, oh yeah...and here.) There are a few criteria I look for in a good snack/nutrition bar, I prefer organic whole food ingredients, and I prefer it to be low in sugar...though I've found that last criteria to be hard to come by. Many of these bars seem to be high in sugar, which has left me scratching my head. If these are supposed to be nutritional (some of them even boasting themselves as meal replacements) then why so many grams of sugar?

     I started reading my labels even more closely and asking the question "Well exactly what kind of sugar is it? Where does it come from?" because that actually matters. If it's high fructose corn syrup then I drop that snack bar like a hot potato, but if it's something like Brown Rice Syrup then I tend to be OK with it, because Brown Rice Syrup has a lower glycemic  index than say, simple sugars like white refined sugar, and therefore is processed more slowly in the body and doesn't contribute to the common sugar high-crash cycle (great info on the benefits of brown rice syrups can be found here.) I also consider the amount of dried fruit in the bar (which there is usually a lot of if you are eating a raw bar) because natural sugars are part of the package when you're talking dried fruit, that's just the way it goes. Finally I remind myself that there can be benefits to sugar, especially if it is a healthier version of the sweet stuff. I often use these bars as an on-the-go snack to hold me over until my next meal, rather than a meal replacement, this keeps my blood sugar from plummeting, which in my experience can be a very ugly thing (shakes, headaches, irritability and exhaustion.)

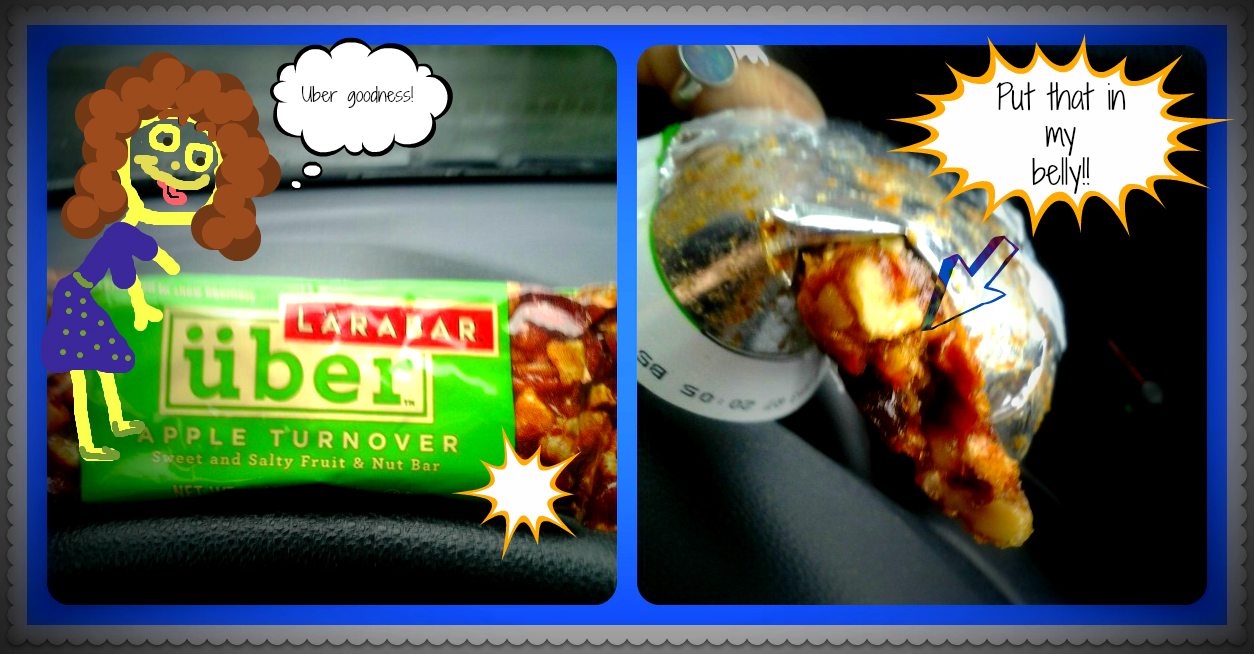
     While I usually opt for more protein packed bars with less of a sweet flavor--like Luna's Peanut Butter Cookie, or Cliff's Peanut Butter Crunch--recently I decided to try a new Larabar that I found at Trader Joe's. My kids love the regular Larabars, which are made with raw, whole food ingredients and are gluten free. The new chunkier style of the Apple Turnover flavored Larabar in their Uber line called to me off the shelf, I had to try. Funny thing is, I had bought a variety of bars that day for on-the-go snacking and completely forgotten what flavor this one was. I grabbed it one day on my way out the door and when I hungrily tore the wrapper off, hours later while driving my car I didn't stop to read what flavor it was.

I promise I was stopped at a light when I took these pics. Don't play with your phone and drive! (Aliment, Copyright 2012)

     All I can say is...Oh my gawwwwd!! First bite and I was completely twitterpated (if you've seen the Disney classic Bambi then you know that to be twitterpated is to be in love!!) I thought to myself... "Mmmmm...this is to die for...this tastes (nom nom) just like (nom nom) an...an? An apple turnover!!!! Like EXACTLY!!" Duh, that's why they named it that. Well done, Larabar. Well done. The apple was ooey gooey (in a good way) just like turnover filling, and the nuts were munchie crunchy. YUM. If you are looking for a new snack bar, you should try this one. I'd eat it for breakfast with a cup o' Joe. Mmmmmm. Did I say that already? MMMMMMM!! I'd love to try the Uber Cherry Cobbler now, hint hint Larabar...wanna send one my way??

Nomatter what you're noshing on today...
Bon Appetit!
Tamar

*I was not compensated in any way for writing this review.

Friday, September 14, 2012

Creamy Caramel Dip

Yes...I am still going on about the apples. This afternoon I was hankering for something sweet and a little salty and kinda healthy, but still indulgent. I'd read a few recipes for Caramel Apple Dip and Cookie Dough Dip and wanted to marry the two into a tasty treat.

After satisfying myself with a few bites I offered this platter to my kids and their friends and it was declared a winner! Seconds were requested and they actually knew what the ingredients were.

Not too shabby mama, not too shabby.


Creamy Caramel Dip


By Deirdre
Prep Time: 3 hrs (soaking)
Cook Time: 5 minutes (mixing)

Ingredients (About 2 cups)
  • 1 cup of Medjool dates (no pits)
  • 1 cup chickpeas (cooked)
  • 1/4 cup nut butter (I used almond)
  • 2 tsp lemon juice
  • 1/2 tsp salt
  • 1/4 cup vanilla
  • Soaking water (warmed)

Instructions
1. Soak dates in warmed water for about 3 hours (or up to 4 is ideal)
2. Remove dates from water, but reserve water.
3. Add dates and chickpeas to food processor. Pulse.
4. Add other ingredients except water. Pulse again.
5. Slowly add water about 1 tablespoon at a time and blend until nice and smooth. Be sure to scrape down sides so everything gets incorporated.
Store in sealed container for up to five days.

Powered by Recipage

Friday, August 31, 2012

Onigiri - Creative Cooking with Children

Copyright: Deirdre/Aliment 2012


I have a thing for cooking playing with my food. I don't really like to cook or bake, but I like to eat and if you connect A to B chances are at some point I will have to find myself in the kitchen if I am to sustain this mortal form of mine.

Each day I make my kids "home lunch" as opposed to school lunch, which appologies if this is personal- it's not meant to be, school lunch is, in the words of my children, "disgusting." I don't know if it has changed much in twenty years, but I ate breakfast and lunch at school if I was lucky and I seemed to have survived.

Anyway, I dutifully pack lunches each morning and, at risk of making my kids out to sound spoiled, they pretty much won't have anything to do with the old "P B & J" standby. I sneak it in about once a week nonetheless, but this mama has to get creative...

I've long admired the bento style lunches commonly found in Japan. For an overview check this out and this. What's not to love?

So I gave Onigiri, also known as rice balls, a whirl. The recipe I followed was from the blog Just Hungry . It was very instructional and guided me toward successfully creating my first Onigiri, if I do say so myself. And my kids were delighted by their lunch!

It really is easy peasy. See the link above for more detailed instructions. Measure 1 cup rice. I used short grain brown. Add two cups of water.


Boil Rice, then reduce heat to low and simmer about 30 minutes. Then allow to cool a bit, so it is just comfortable to handle, but not cold.


Prepare ingredients. I used a splash of rice wine vinegar. A piece of plastic wrap in a small bowl. I drizzled some water on the on the plastic so it doesn't stick. Followed by a pinch of salt. I scoop the rice into the bowl. Poke a shallow hole in the center and insert peas and edamame for the "treasures" in the center of the ball.


Gather the plastic wrap then twist to shape into a ball. Then once it's nice and snug you can remove the plastic and shape as desired. Decorate to your heart's desire or sprinkle with Japanese rice seasoning. Domo Arigato.


Bon Appetit,
Deirdre

Monday, August 20, 2012

Tamar's Spicey Kale Chips

     In the mood for a crispy, light, salty snack? Beautiful, delicious, versatile and nutritious kale can be prepared to deliver all that plus a powerful nutrient punch! This easy peasy recipe had quenched my cravings and had me snacking greedily all weekend long without any post binge guilt (who can feel guilty for binging on kale???) Yummmmm. Try it and Enjoy!

Copyright, Aliment 2012

Below is a pictorial run-down of the super easy process. Kale is so easy to dress up with any flavors you are craving, mix it up, experiment, have fun, enjoy!!

Copyright, Aliment 2012
Bon Appetit!
Tamar

Monday, August 6, 2012

Tamar's Bruschetta Nouveau

Aliment, Copyright 2012
     While experience can be thanked in large part for the development of my culinary intuition, necessity (the mother of invention) deserves an honorary mention. I have a large family, as modern families go, and we live on a tight budget, creativity is required in order to keep our palate's from falling into a slump of monotony while using whatever we have on hand rather than buying the perfect/classic ingredients for any number of recipes.

     In the spirit of Culinary Intuition, I will share with you today my very own Bruschetta Nouveau. This recipe came about without any planning whatsoever...I simply had a tomato and a couple of interesting Lemon Cucumbers from my sister-in-law's garden that I needed to use before they went bad. My mother-in-law had recently dropped off a delicious loaf of tuscan garlic bread. Yesterday was a particularly hot and muggy New England day, with tomato and cucumbers in hand it didn't take long for my brain to make the leap from "I should use these up" to "Ahhhh...cool, tangy, refreshing bruschetta...it's been too long!" especially once I noticed that loaf of bread on my counter. In the past I would never have thought of putting cucumbers in bruschetta and I would have fretted over not having any fresh basil. I tended to stick to recipes in their exactness for fear that my own instincts were not sharp enough to lead me down a yummy road, I needed a recipe to help me navigate my way to deliciousness. The only bruschetta I'd ever had (until I made my own yesterday) was made with red onion, garlic, tomatoes, and fresh basil. Simple and delicious yes, but not the only way it can be done. I don't have that fear I mentioned any more, I spend much more time saying things to myself like "cucumbers in bruschetta...why not? No basil? Who cares...I have fresh cilantro, that could work. Let's shake things up!" And you know what? My time in the kitchen is much more fun, less stressful, and I'd venture to say...more delicious than EVER.

      ....So that is why I want to say to you, dear reader, before you make this (or any other recipe) especially if your attitude in the kitchen is currently much like my former one: Have no fear. Shake things up! Even as you look over my recipe, remember...you don't have to stick to it! Get creative, use what you have on hand. There's no need to break the bank, or waste your time running all over town trying to pick up the exact "right" ingredients. Besides, in my research I have found that there really isn't an exact "right" recipe for bruschetta, it is very malleable and chef's have created many variations on the theme. While there are certain "temperamental" dishes (that's what I call them any way) that should be carefully prepared one way in order to do it right (pastries like croissants and scones come to mind) there are loads and loads of dishes that are easy going, flexible types for those of us who may not be trained chef's but are willing to get in the kitchen and take some chances...life's too short and foods too awesome to waste time stressing over something that is meant to be truly enjoyed.
   
     Now that my pep talk is out of the way...the recipe:

Aliment, Copyright 2012


1. One large tomato--chopped
 
2. Two small cucumbers--diced

3. Two small onions, one rib celery,  
six garlic cloves--coarsely chopped

4. Generous drizzle (in equal parts) of 
chili infused olive oil and red wine vinegar

5. Fresh cilantro, dry oregano, 
salt and pepper--to taste

6. Place all ingredients in a 
2 qt jar--Shake! Shake! Shake!

7. Garlic bread slices topped with  
shredded mozzerella-provolone blend
--broiled until golden  

8. Serve one on top o' the other. This pairs well 
with Trader Joe's "Charles Shaw Chardonnay" (a.k.a. "Three Buck Chuck" white wine)

     Although bruschetta is normally served as an appetizer, you should know by now that I am not one for rule following. I ate...Four. Large. Slices....for dinner last night. It was to die for. So delicious!! It should also be noted that I prepared the veg around noon and then refrigerated it until dinner time, which allowed the flavors to blend really well. Let me know if you make it, and if you vary the recipe I'd love to know what you tried. I would say let me know if  you liked it...but that's a given, I know you will!
 Bon Appetit! 
Tamar 
Aliment, copyright 2012


Wednesday, August 1, 2012

Banana "Soft Serve" with Mix-Ins

These are mini bananas.
And I just think they're cute.
For the following recipe ordinary bananas are preferred.
You may have noticed I am on a hot (or cold) streak these last few Fridays with chilled-out, mellow, summer treats:
And I will keep at it as long as I have sunny summer days...okay, well I probably will mix it up a bit, but I have one more cool and refreshing treat to share and this one wears a cloak of "health food." That is, you can convince yourself that what you're eating is good for you, provides essential nutrients and can be enjoyed more than once a day. Wink.

I first came across banana "soft-serve" during a bleary, late night blog reading marathon. Does anyone else do that? Does that make me a dork? Or super cool? Well, I'm at the age where I don't care much, but I do so deeply appreciate the impact the blog world has had on my life. I've encountered amazing people, with amazing talents, food, crafts, fashion and more and have in many ways been invited to think more deeply about my own life. The best of the best really. But I digress, back to the soft-serve.

When I first found this recipe it wasn't described as such, but more along the lines of look what happens if you toss frozen bananas into a food processor (and if I could possibly retrace my steps and stumble upon that blog post again and give credit, I would...but unfortunately my dog tired brain simply can't remember where I saw it. So if you happen to know that you posted about a particularly delicious frozen banana treat months ago, KUDOS!)

Anyway, it really is like MAGIC, the alchemy that happens when you:

1. Get yourself a bunch of bananas. The riper the better.

2. Peel and slice into coins.


3. Place them on a cookie sheet to freeze.

4. Taking about a third of the total place them in your food processor (careful to head the fill line. If you have a smaller unit you may have to do this in several batches.)

5. Pulse until the bananas resemble coarse crumbs.

6. Add more frozen banana coins.

7. Repeat...

8. Add some more.

9. Repeat...

10. Then pulse/mix until a creamy, luscious ice cream like texture is achieved.
At this point I often just go for it and have a bowl, sharing with my family of course, but you can also scoop it out of your food processor and freeze in a container until you're ready to enjoy.

Also, my most favorite way to enjoy my banana soft serve is to warm up a tablespoon of Cookie Butter, yeah that's right, and drizzle it over the top. Nom, nom, nom.


Other delicious mix-in ideas, to be added either during the processing, before freezing or whenever you are ready to indulge include:

  • Your favorite nut butter. Like Elvis, I love the peanut butter and banana combo.
  • Berries
  • A tropical number: pineapple tidbits, coconut and perhaps a bit of chocolate.
  • Walnuts and caramel.
  • Oreos or another cookie (this is often a good way to make use of any crumbs you have left over.
  • Or class it up with lavender and honey.
  • I've also added a bit of coconut milk/cream during the processing and if you aren't a banana lover, this mellows the banana flavor.
If you have any other toppings that you've tried or would like to recommend, please do so in the comments below.

Bon Appetit,


Deirdre

Friday, June 29, 2012

Cook School by Amanda Grant Cookbook

Click for more info/to order


Cooking and I have a love-hate relationship. I love to eat, I hate to cook- the process that is. I just don't have a mind for it, get impatient and loathe washing the dishes, but cook I do -- otherwise we'd be eating cereal and for every meal. And although that is essentially what I subsisted on during my childhood I'd prefer my children have a more balanced diet.

What I do love is getting into the kitchen with my kids and gently assisting them as they learn how to measure, slice, mix and create a nourishing meal. I thoroughly enjoy the delight when they enjoy something we've made together. Adding a bit of love to a home cooked meal really does make it taste better.

When I stumbled upon the book, Cook School by Amanda Grant I knew I'd found a gem. The book is broken down into segments based on age/ability. The photos are gorgeous, if you're into that kind of thing- I am! And the recipes are super tasty. I had each of my kids pick two dishes each we'd make together and then a few of my own that I just wanted to try. All in all I think we tried close to ten and they were all winners.


We "adopted" the chickens produced by a class "hatching" project a couple years ago. And by adopted I mean my kids begged for days and made wild promises if we could just take them home. Two years later and we are gifted with fresh eggs everyday along with fresh "landmines" in the yard, but all in all I love those birds and am glad they're part of family. Them are some classy ladies!


One of our faves from Cook School was the Tasty Bread Tarts...The recipe is easy and adaptable and only requires multi-grain bread, fresh eggs, a few splashes of milk, a vegetable like peas, a sprinkle of cheese and some seasonings. For the recipe click here.


Do you have any favorite dishes that you prepare with your kids? Any books to recommend? Please share!

Bon Appetit,
Deirdre


*I was not compensated monetarily for this review.

Friday, June 22, 2012

Gone Bananas Monkey Bread

We are a household of banana eaters, one or more a day for each of us, so when I scored half a case of organic-fair trade bananas for $3 I jumped up and down like a happy monkey.


But what to do with that many bananas? We made smoothies, breads, pancakes, ate them straight-up, froze some and made a few batches of banana soft-serve. Look for that recipe here soon! But there were still so many and they were in danger of passing their peak.

We checked out 100 banana recipes here, but wanted to come up with 101.
So my little monkeys and I strapped on our thinking caps and came up with Gone Bananas Monkey Bread.

Here is how it went...Scroll all the way down for a printable version of the Cook's Illustrated recipe we adapted a bit.


Ingredients assembled.


Add yeast to water, milk and butter mixture...for a truly tropical taste, I used coconut milk and let it do it's thing.


Meanwhile measure flour and salt. Mix.


Combine wet and dry.

Knead away.


Cover with plastic wrap or a damp towel and let rise.


Meanwhile mash a couple bananas and let 'em ripen some more.

Assemble ingredients for dipping sauce, including ripened bananas, melted coconut butter, brown sugar and a sprinkle of cinnamon.


When dough is done rising roll pieces into one inch balls, dip, coating thoroughly and place in greased pan.


Sprinkle with coconut and nuts (if desired.)


Bake, cool and...


Glaze...


 Then enjoy!!!


Gone Bananas Monkey Bread
by Deirdre
Prep Time: Approx.2 1/2 hours (rise time)
Cook Time: 35 minutes
Ingredients (Serves 4 gorillas or 8-12 Capuchins)
  • For Bread:
  • 1 cup of coconut milk (or regular milk - warmed to about 100 degrees F)
  • 1/3 cup of water (warmed to about 100 degrees F)
  • 4 tbsp coconut butter or regular butter -- melted
  • 2 1/2 tsp yeast (or one packet)
  • 1/4 cup granulated sugar
  • 4 cups all purpose unbleached flour (plus more for kneading)
  • 1 tsp salt

  • 1 cup shredded coconut
  • 1 cup walnuts or macadamia nuts Optional
  • Spray or butter for greasing pan

  • Dipping Sauce For Bread:
  • 1/2 cup coconut butter or regular butter (or blend) -- melted
  • 2 very ripe bananas - mashed
  • 1/4 cup brown sugar
  • a few sprinkles of cinnamon

  • For Glaze:
  • 1/2 cup confectioners sugar
  • 1 tbsp coconut milk
  • 1/4 cup shredded coconut
Instructions
In a glass measuring cup eat milk and water to about 100 degrees F (in microwave or if using stove top use a pan.) Melt butter and add to mixture. Be sure temperature isn't over 110 F.

Add sugar and yeast to mixture. Stir and let it do it's thing for 5 to 10 minutes.
Meanwhile in a large bowl (or if you're lucky enough to have a stand mixer in it's bowl) mix flour and salt.

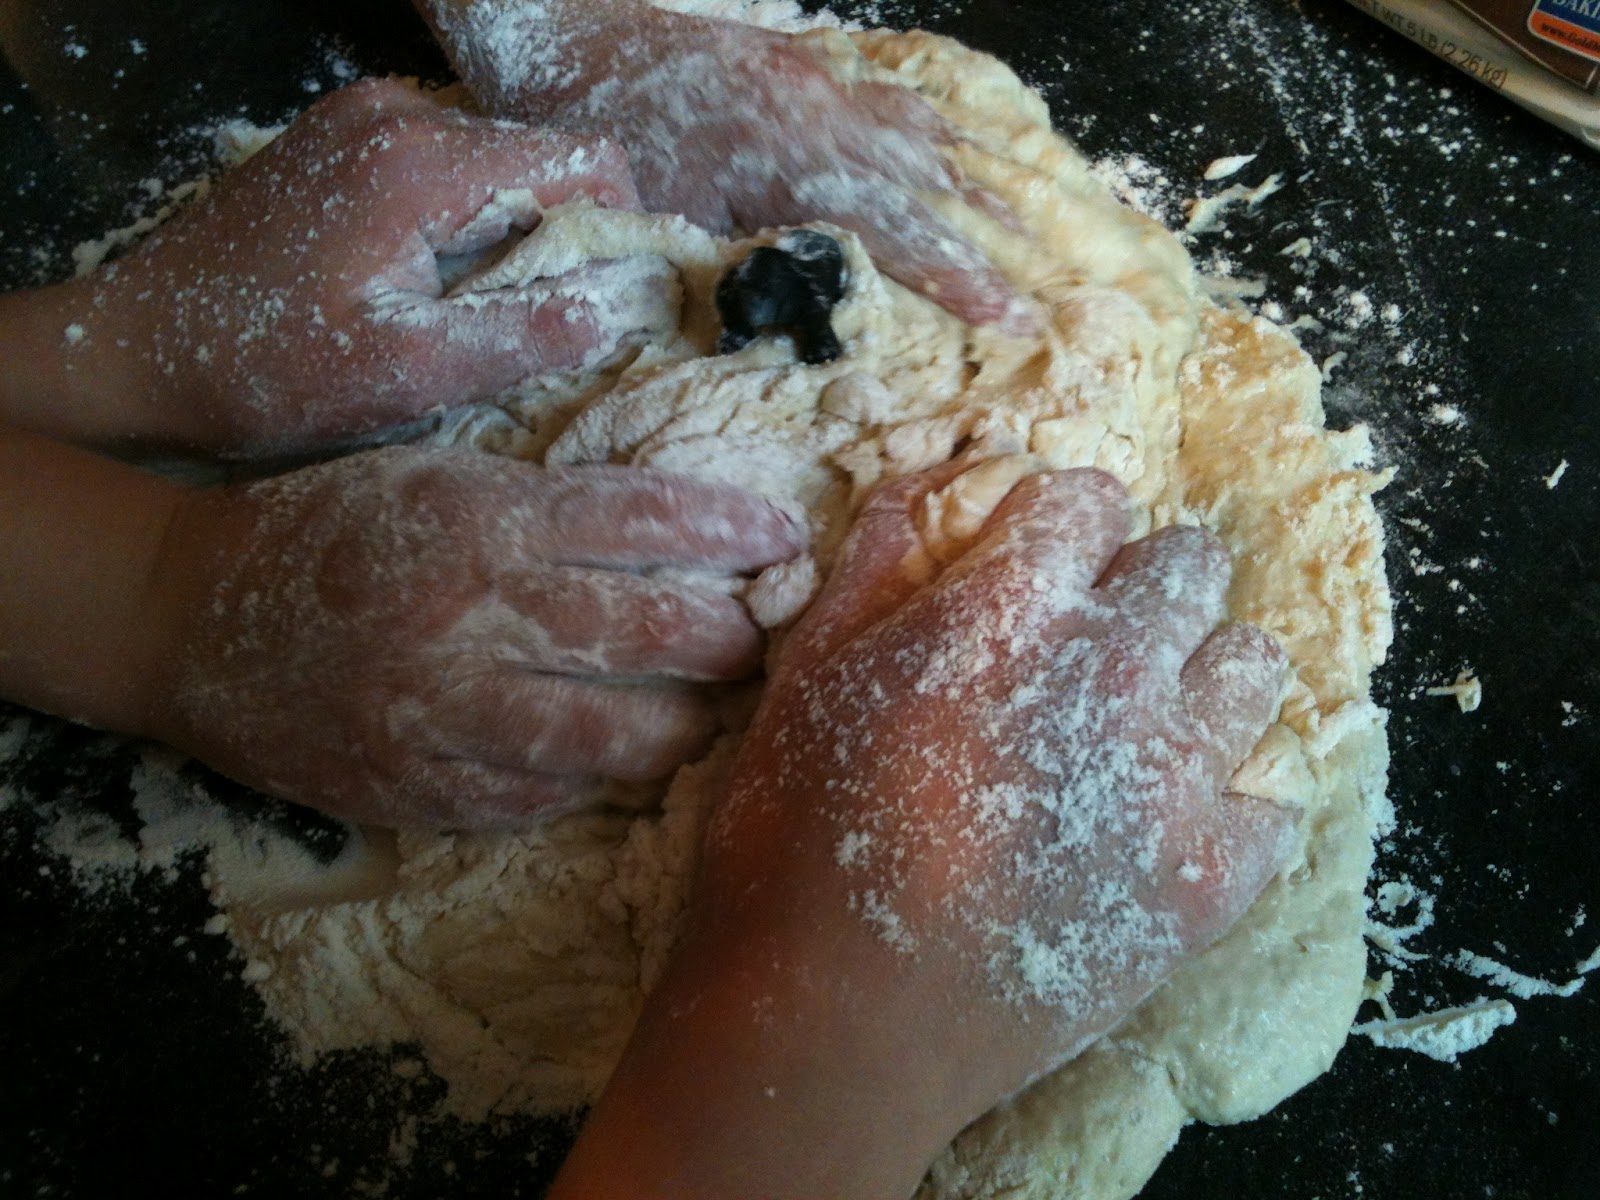
Then form a well in the flour and combine the two with a wooden spoon until somewhat stiff and incorporated. Mix with a stand mixer or if kneading be sure to add flour to keep the dough from sticking. Knead for about 7 minutes or until a soft and smooth dough forms.

Place in a greased bowl, cover with plastic wrap or a warm clean towel and let it rise in a draft free place for about 1 hour.

Remove from bowl, break pieces into bite sized balls (approx 1 inch diameter) dip each in dipping sauce and place in greased bundt pan (or similar pan) overlapping each ball so a nice dense bread/cake is formed all the while sprinkling coconut and nuts if desired into crevices.

Cover like before and let rise 1 more hour.

Then bake in an oven preheated to 350 F for about 30-35 minutes or until golden.

Allow to cool in the pan for about 5 minutes, Turn out onto a platter and allow to cool another 10 minutes.

Meanwhile combine glaze ingredients and mix up then pour over the top, serve warm and enjoy!
Powered by Recipage

 From my monkeys to yours-
Bon Appetit,
Deirdre


Tuesday, June 19, 2012

WIAW -- Deirdre Eats...


I can't believe it's Wednesday again! Mid-way through June, whew! Time is flying by...Alternating weeks, Tamar and I participate in What I Ate Wednesday hosted by Jenn from Peas & Crayons. If you like to be inspired, see how other people mix, match and make it through the day with food as their companion check in here and on Peas & Crayons for an eyeful of yummy goodness.

If you've been following us for a while you'll see my breakfast staple in my food diary never varies (okay, rarely varies and only to the extent of fresh or frozen blueberries and if I don't have a banana (gasp!) I will slice up a pear, apple or whatever fruit I've got that is ripe.)

Here is my fabulous and favorite breakfast to get me going everyday:


And don't worry- I don't eat the plant, it just makes me think I'm in the tropics along with that almond-coconut milk blend. So what I've got there is Ezekiel cereal, blueberries, bananas, alt-milk and a splash of flax-oil for me brain. (It has those essential omegas.)

After breakfast I did an hour long yoga practice with Elena Brower on Yogaglo who has the most calming effect on me. I adore her. I am a yoga instructor, but I really enjoy shutting off that part of my brain and just tuning into someone else's instruction.

Then I take a seat at my desk and write, write, write about...you guessed it FOOD!

For lunch I had a bowl of Creamy Broccoli Soup. It was leftover from dinner and I topped it with onion straws and a sprinkle of cheese.

Creamy Broccoli Soup


by Deirdre
Prep Time: 10 Minutes
Cook Time: 30 Minutes or so
Ingredients (4 Servings)
  • 1 medium onion
  • 3 cloves of garlic
  • 1/4 cup of butter or butter-alt
  • 1/4 cup flour
  • 4 carrots- peeled and sliced
  • 2 broccoli crowns - sliced
  • Optional: any other veggies you have on hand that need to be used (corn, potatoes, peppers, celery, etc.)
  • 4 cups of milk or milk-alt
  • 2 cups of water
  • 1-2 cups of cheese
  • Optional: onion straws

Instructions
In a large soup pot melt butter over medium heat.
Stir in onions and cook until translucent (about 5 minutes)
Stir in garlic and cook (about 2 minutes more)
Add flour and stir until it forms a paste.
Heat milk until luke warm (I use the microwave)
Add milk 1/2 cup at a time allowing mixture to thicken
Add veggies
Heat water until luke warm (or get warm from the tap)
Add water 1/2 cup at a time allowing to thicken.
Cook until veggies are soft (about 10-15 minutes)
Remove from heat.
Use an immersion blender to blend soup (or use a blender *but blitz in small batches...hot liquid and the blender can cause a big hot blow up!)
Add cheese
Ladle and top with some more cheese and or onion straws and a sprinkle of pepper.
Enjoy!
Powered by Recipage


The afternoon called for a pick-me-up so my girls and I baked Banana Snacking Cake from Nicole of Local Sugar Hawaii (one of my favorite blogs written by a lovely gal who has a real way with words.) We made a few modifications to her original recipe. It was moist and the coconut topping gave it added sparkle. I require added sparkle as frequently as possible, especially in the afternoon, I tend to get slumpy.

*The changes I made: added 1 tsp vanilla, 1/2 cup brown sugar, upped the buttermilk to about 3/4 cup (just added until it looked more moist) used Ener-g egg replacer instead of eggs and for the first half hour of baking I covered with foil, then removed for the last 10 minutes.

Dinner came a while later and I prepared a variation of Simple Summer Spaghetti from the Better Homes and Gardens June 2012 issue.


*My changes: I used cellentani - corkscrew pasta, added white beans, regular tomato instead of grape tomatoes and I added summer squash as well.


And for dessert: my very own container of So Delicious...and Yes- I did eat it right out of the carton, it was after all mine!


Happy Summer- hope you get your hands on your very own container of your favorite cold and creamy summer treat!

Bon Appetit,
Deirdre